What to do when I'm stuck sick in bed all day?? Fold origami lilies of course!

Supplies:
- Origami paper (amazon selection of paper)
- Something to curl petals (I'm using a skinny paint brush)
- Instructions (the book I have is ok but I felt like I could simplify the steps a little more)
Let's get started:
 |
| Get your paper out and be ready to fold! |
 |
| Fold in half corner to corner |
 |
| Fold in half again... |
 |
| and in half AGAIN! |
Basic Base:
 |
| Now open up the paper and it should look like this :) |
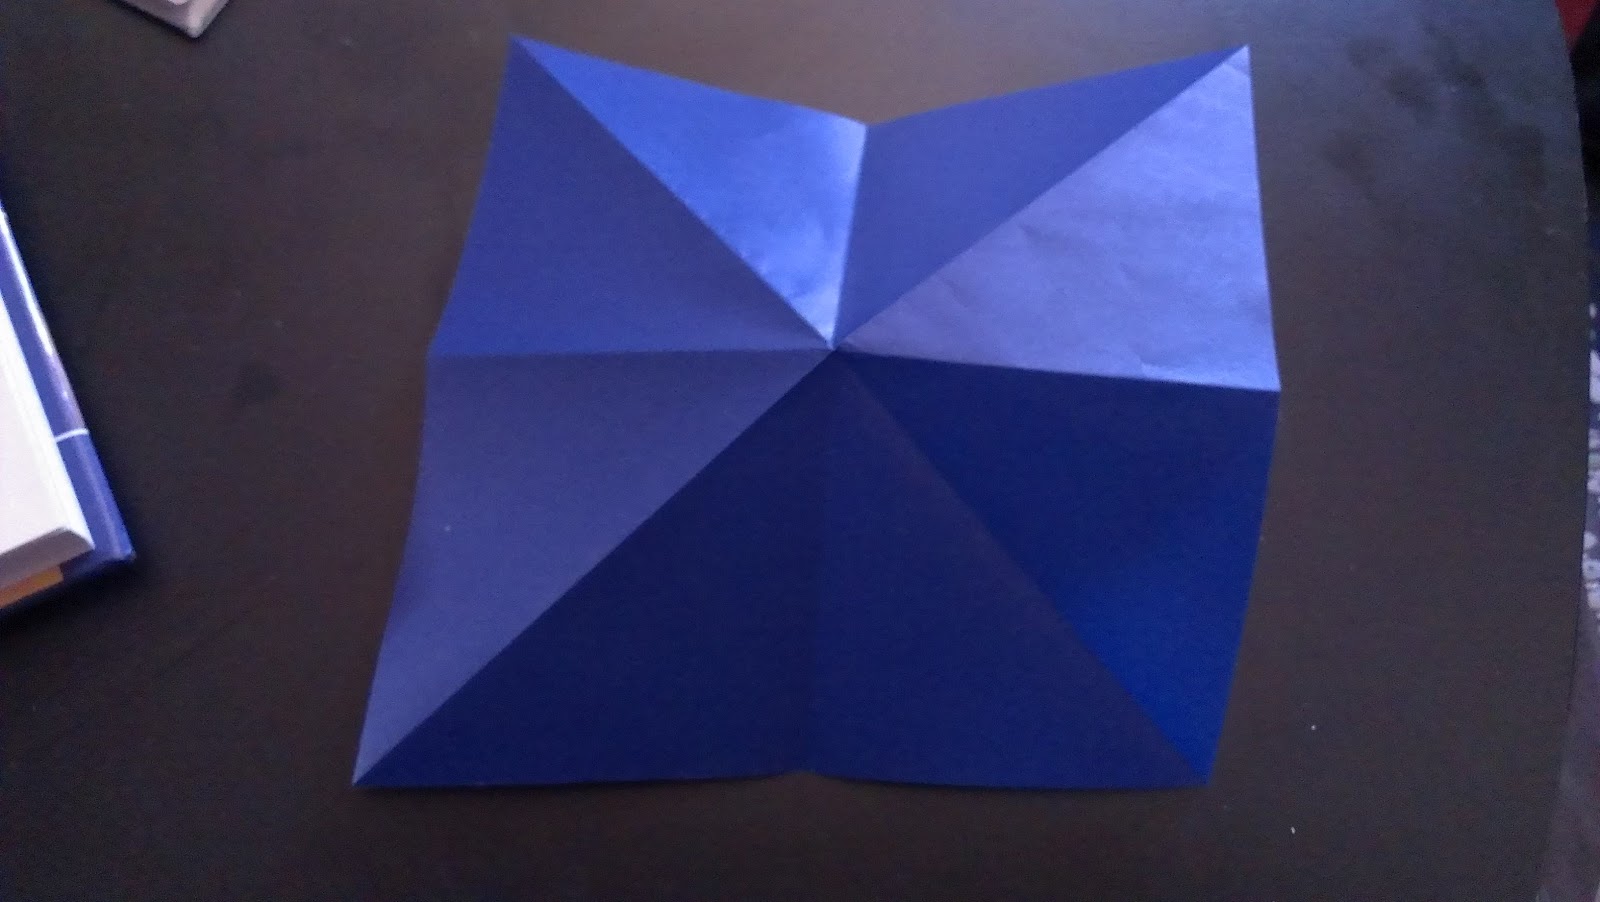
 |
| Fold in half again, corner to corner. |
 |
| Fold IN one side using the creases as guidelines |
 |
| Fold in the opposite side in the same manner |
 |
| This completes the basic base |
Frog base:
 |
| Now fold up one of the flaps. Spin your whole creation 180 degrees. |
 |
| Flatten flap so the crease lines up in the middle |
 |
| This is what you should have so far. Repeat the above step for all remaining flaps. |
 |
| Fold the sides in so they line up with the middle crease and no more white is showing. |
. |
| Now unfold the tiny flaps |
 |
| Carefully fold up the top flap so the tiny flaps come in and line up in the middle again and no white is showing. Repeat the previous steps for all remaining flaps. |
 |
| Flip your whole creation 180 degrees so the open flaps are facing up. This completes the frog base! |
Now on to the lily!
 |
| Fold up the middle triangle to face up with the open flaps. Repeat with all remaining flaps. |
 |
| Now open the flower so all you see is smooth paper. |
 |
| Fold in the bottom sides so they line up with the middle crease. |
 |
| Repeat for all smooth sides and this is where you should be by the end. |
Finishing touch ;)
 |
| Wrap the top open flaps around something skinny and round to get the curled petal look |
 |
| And a million folds later you have yourself a paper lily!!! |
Hope this tutorial was easy to follow and enjoy crafting it up!!
 |
| Sierra made sure I was doing everything correctly and that my feet stayed nice and toasty!! |


No comments:
Post a Comment